
QuickBooks UAE E-Invoice processing with Azdan
Create your invoice in QuickBooks Online, follow its progress in Azdan UAE E-Invoice, and return to QuickBooks to check the result against the original invoice.
This guide assumes your company has already configured the connection, the release of invoices and the return of results. Use your normal finance role. The public QuickBooks screens show example records and layouts; names, currencies and tax rates vary. Use the same invoice number throughout your own checks.
1. Create the invoice in QuickBooks
Check that you are in the correct QuickBooks company. Select + Create > Invoice; some layouts show + New > Invoice. If the sale started as an estimate, open the estimate and use its invoice action so that the sale is not entered twice.
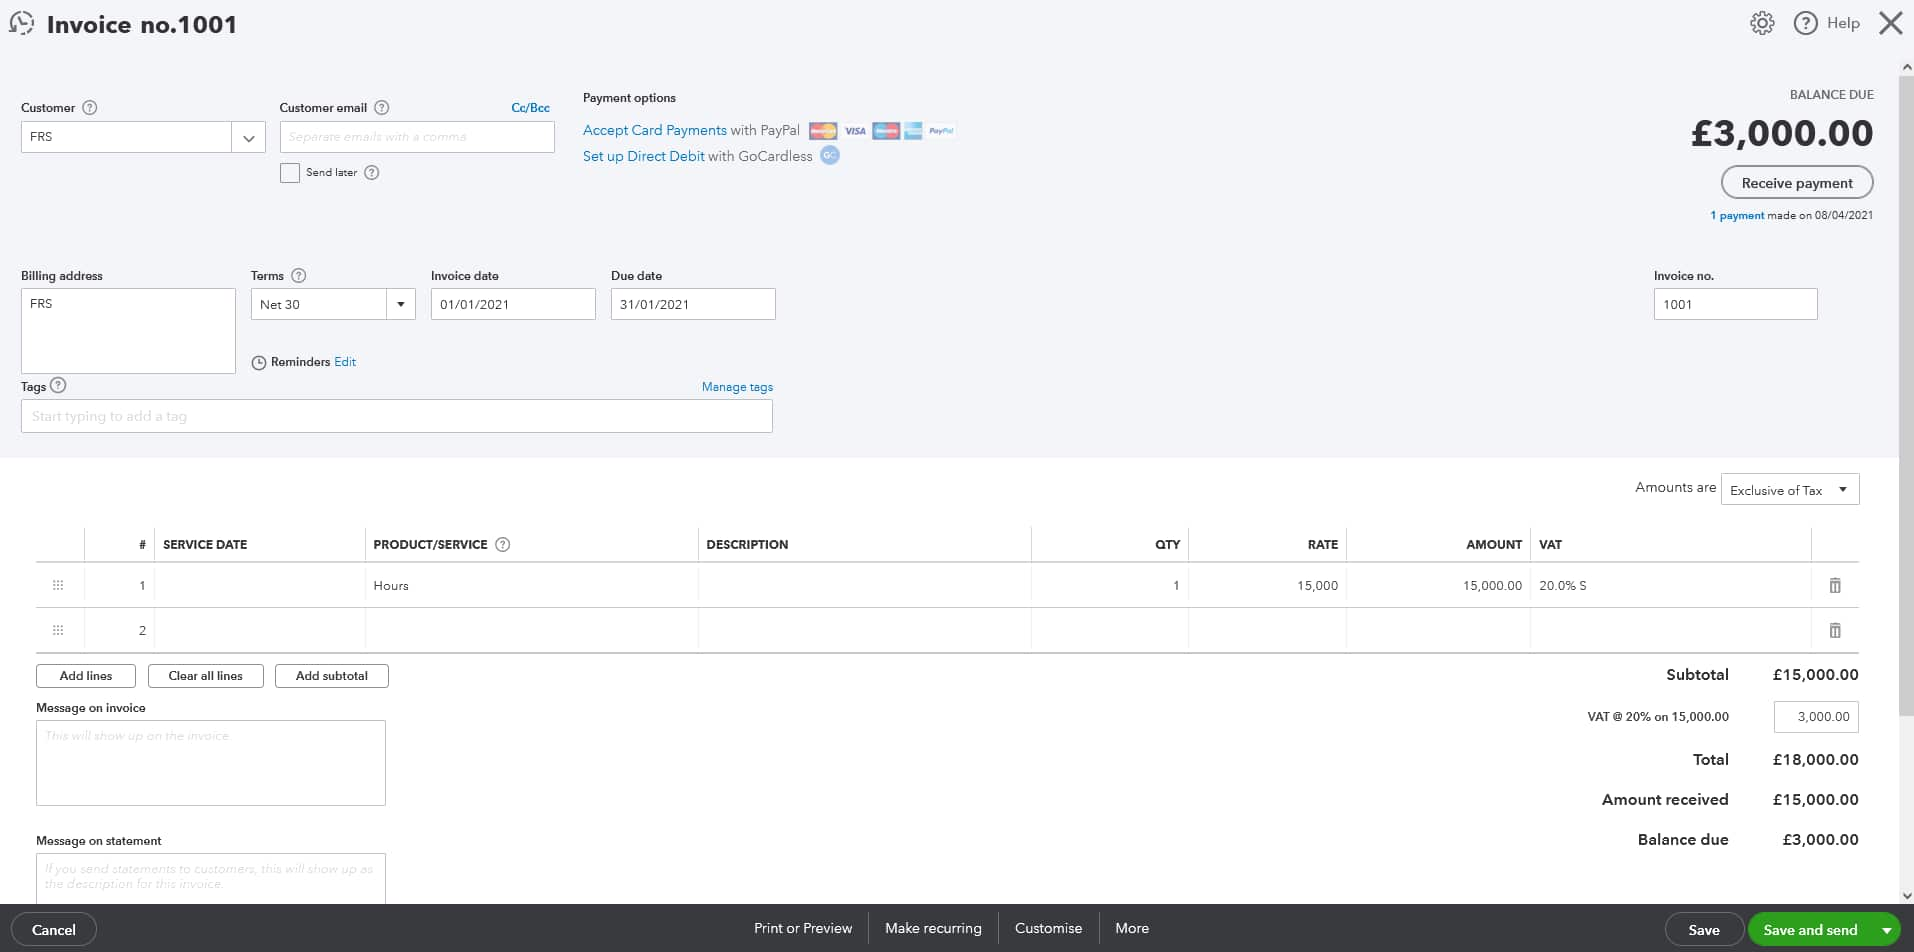

- Select the Customer. Check the legal name and billing address, then review the invoice date, due date, terms and invoice number.
- Confirm the customer TRN and electronic delivery identifier in the records used by your connection. An email address alone does not identify the buyer on the e-invoicing network.
- Check the currency, exchange rate where applicable, purchase order reference and sale location if your form uses it. Resolve missing information before releasing the invoice.
2. Check the invoice lines and VAT
For each Product/Service, review the description, quantity, rate and amount. Add the remaining lines and check any discount. Make sure the selected item and description reflect what was supplied.
Review Amounts are or Invoice amounts are. Confirm whether the agreed prices include tax or exclude it. Check the tax code on every line, using your company’s approved UAE tax treatment.
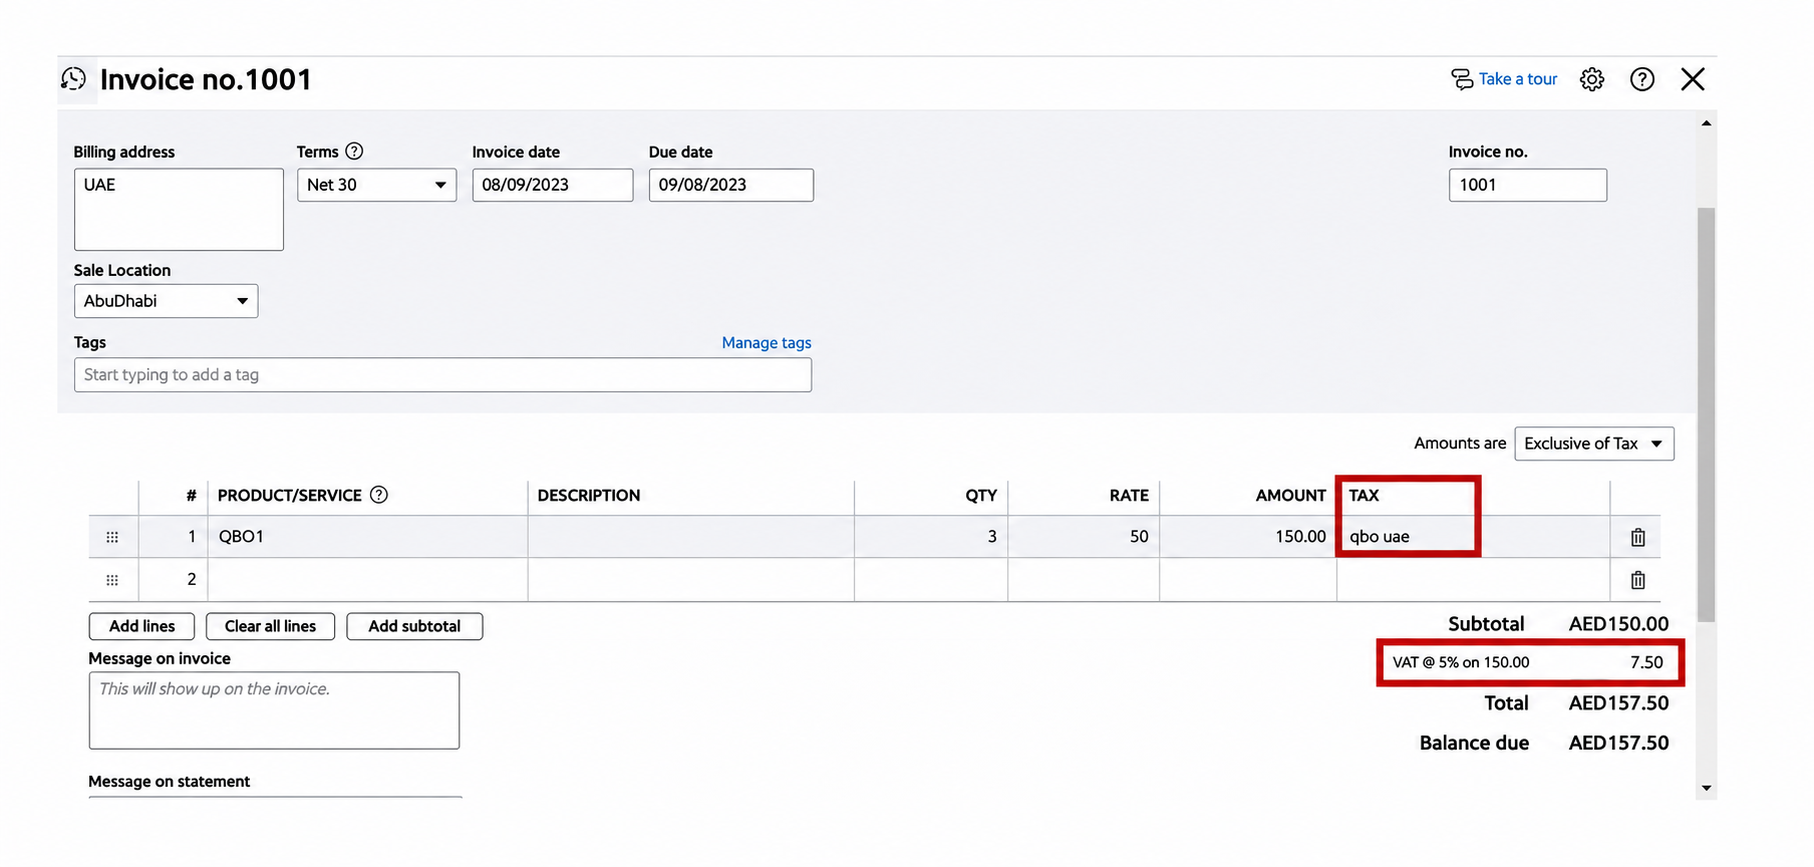
- Reconcile the subtotal, discounts, VAT and invoice total to the agreed sale. The example above is one standard-rated transaction; it is not the tax treatment for every sale.
- Use the invoice total when comparing the document with Azdan. Balance due may be lower after a payment or credit and is not the original invoice amount.
- For a foreign-currency invoice, check the exchange-rate information required by your connection. Use the correct tax category and any required reason for zero-rated, exempt or out-of-scope lines.
3. Save and release the invoice
Select Save or Save and close, depending on your form, and note the invoice number. If your company requires approval, complete it before the configured release step. Your connection may collect eligible invoices automatically or use a separate release action.
Save and send or Review and send emails the QuickBooks invoice to the customer. Use it only when your normal process calls for that email. It does not, by itself, confirm submission to Azdan.
4. Let the connection prepare the e-invoice
After release, the configured connection takes the invoice information from QuickBooks and prepares the electronic document for Azdan. You do not need to re-enter the sale in Azdan. Keep the QuickBooks invoice number as your reference.
| QuickBooks information | What it supplies to the e-invoice |
|---|---|
| Invoice number, dates and currency | The document reference, issue date, due date and currency. |
| Company and customer details | The seller, buyer, addresses and identifiers used for delivery. |
| Products, descriptions, quantities and rates | The invoice lines and their amounts. |
| Tax codes, discounts and totals | Tax categories, tax amounts and the document total. |
| Terms and payment details | The payment information required for the invoice. |
Azdan validates the submitted document before delivery. Missing identifiers, inconsistent totals or an incorrect tax category can stop processing. Your invoice remains the source record in QuickBooks while the issue is resolved.
5. Find the invoice in Azdan
Open Invoicing > Transactions > Outbound. Enter the QuickBooks invoice number in Search transactions, then open the matching result.
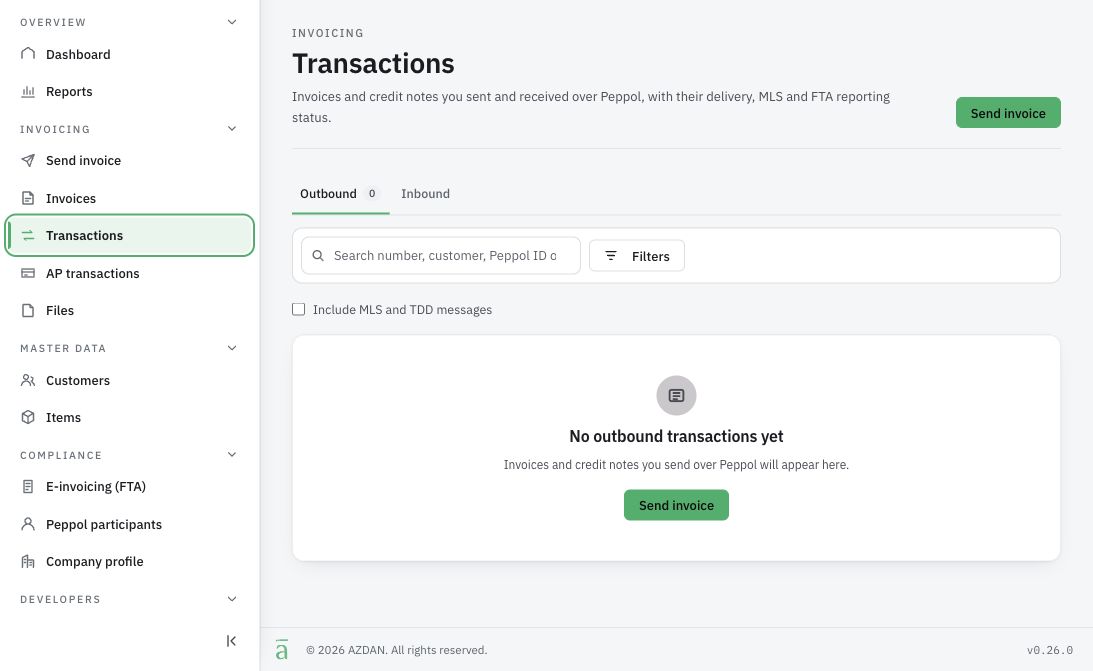
Match the invoice number, company, customer, currency, VAT and total. If the invoice is missing, clear restrictive filters and check that it was saved and released in QuickBooks. If it is still missing after your normal processing interval, give your administrator the invoice number and release time.
6. Review the results in Azdan
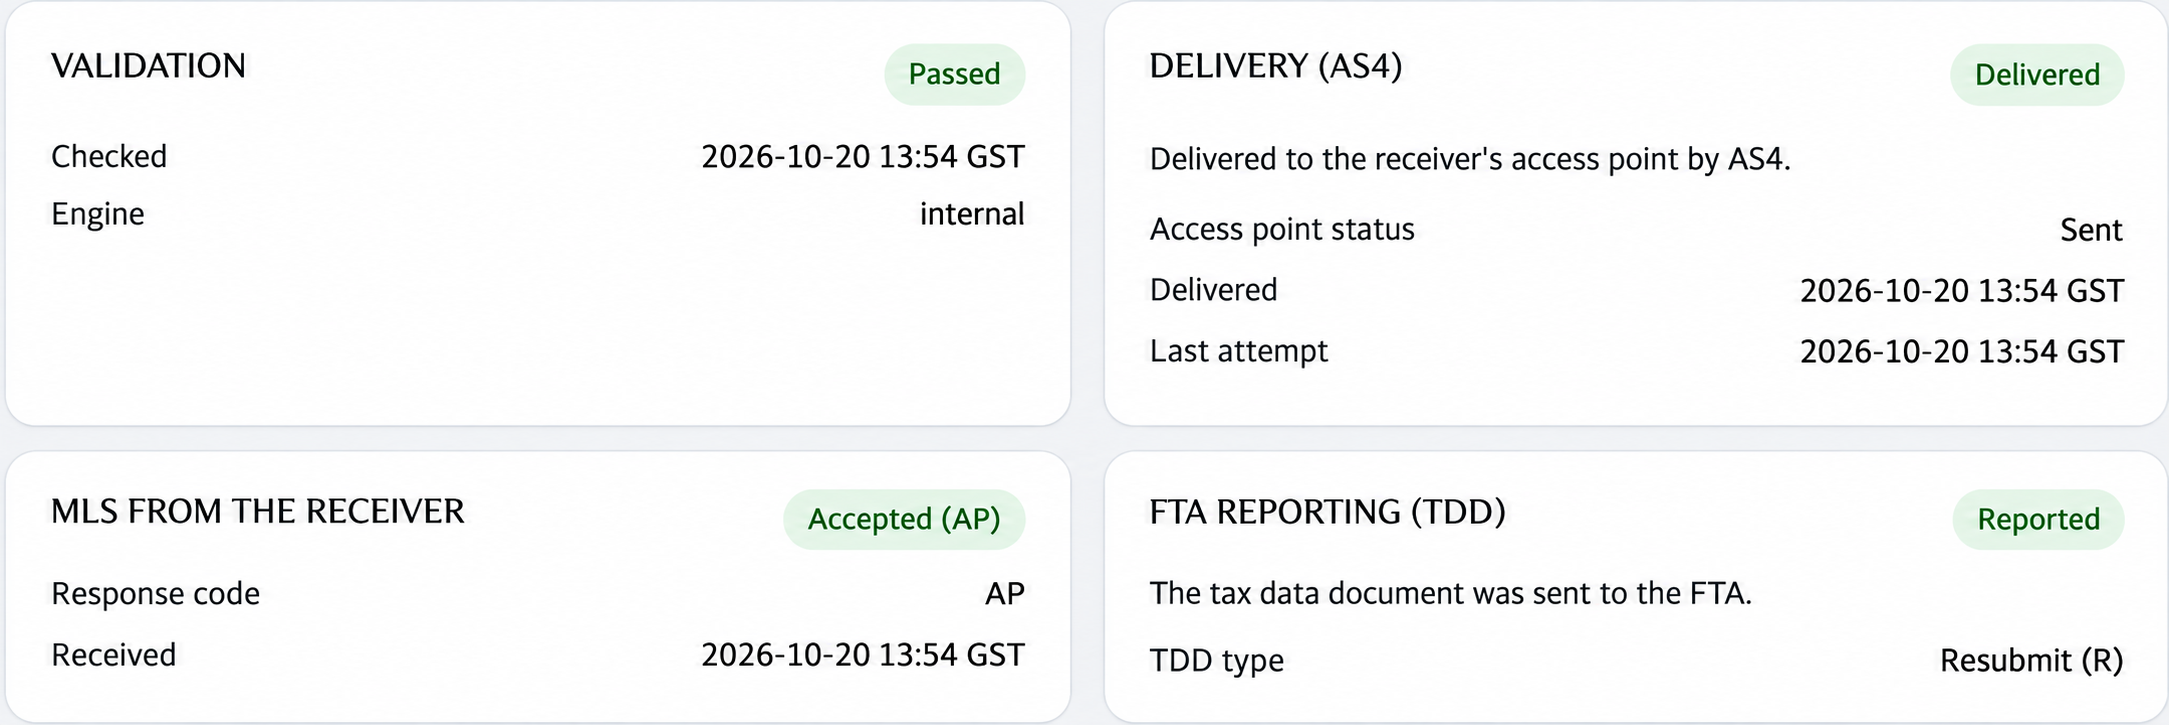
Read each result on the transaction. Validation, delivery, the receiver’s response and FTA reporting can update at different times. Check the detail behind any pending or unsuccessful result.
| Result | What the accountant should check |
|---|---|
| Validation | Passed confirms that the document passed Azdan’s checks. If it failed, read the message to identify the missing field or incorrect amount. |
| Delivery (AS4) | Delivered confirms delivery to the receiving provider. It does not confirm that the buyer approved the invoice or paid it. |
| MLS from the receiver | Read the receiver’s response and its reason. Acceptance at the technical stage is separate from commercial approval by the buyer. |
| FTA Reporting (TDD) | Read the reporting result and response details. Reported means the tax data was sent; that label alone does not confirm FTA acceptance. |
Keep the Azdan transaction reference with the invoice follow-up. Retain the available document and response records under your company’s filing process. If all required results are satisfactory, continue to step 8.
A QuickBooks status such as Sent, Viewed, Overdue or Paid describes activity in QuickBooks. Use the Azdan transaction and the results returned by your connection to check electronic delivery and reporting.
7. Follow up failed invoices and corrections
For your daily review, open Filters in Azdan Transactions. Select Failed or rejected, choose the date range and apply the filter. Review In progress separately. Open each affected invoice to read the message.
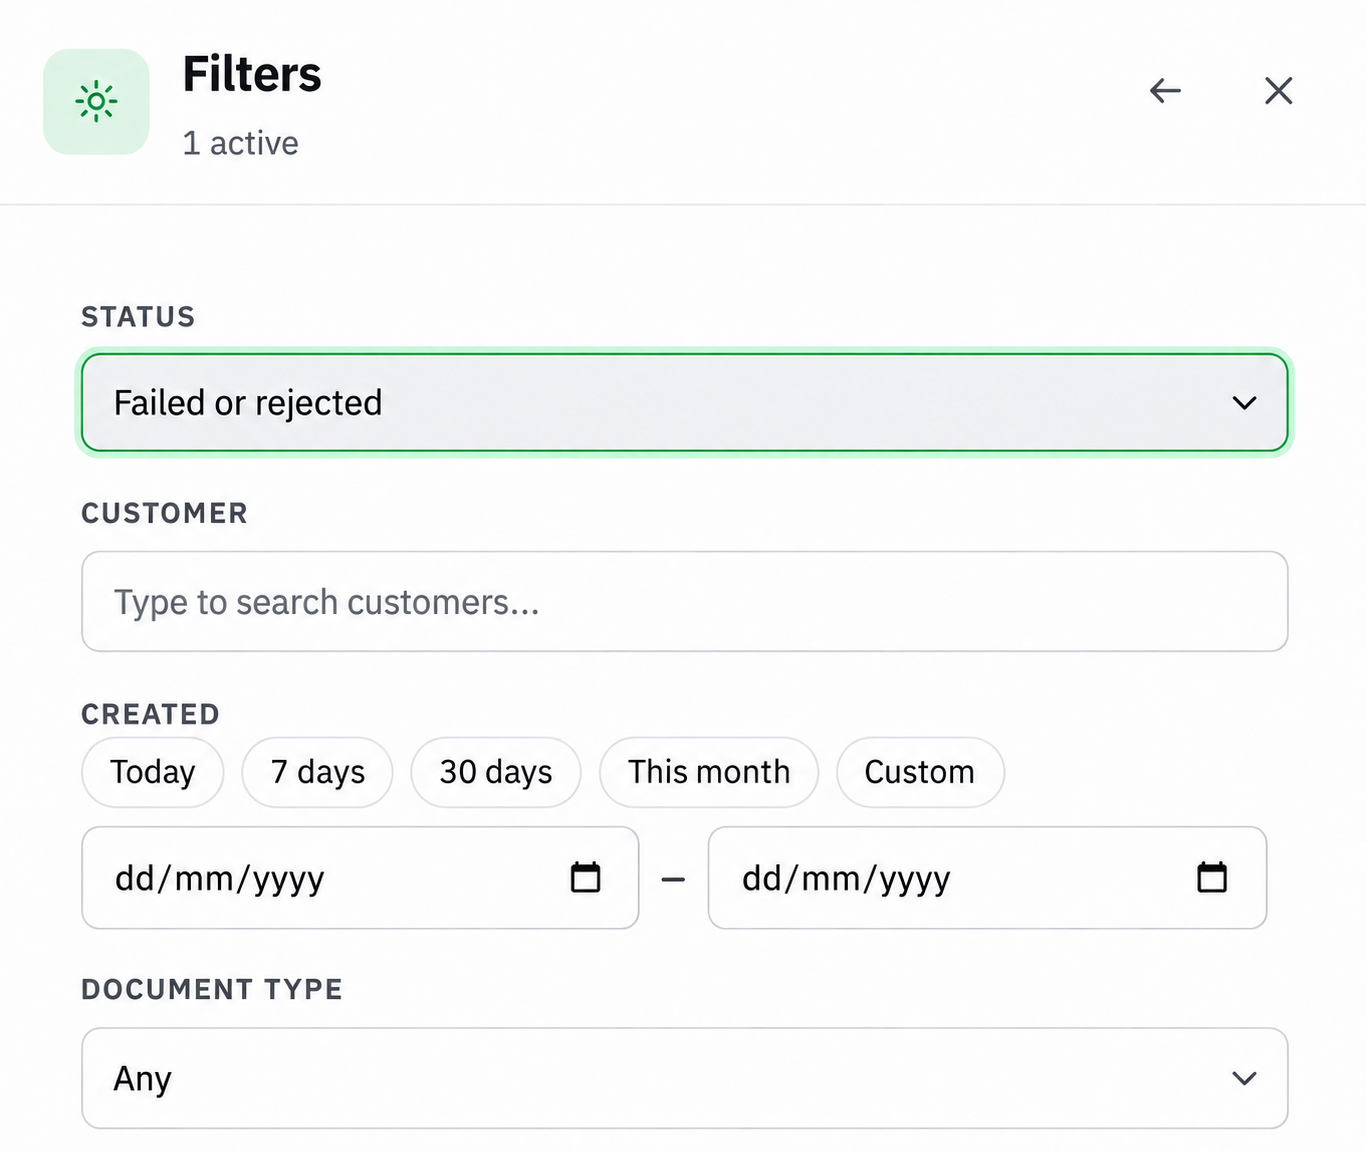
- Missing or incorrect information: Find the field named in the message. Correct the source information in QuickBooks under your normal controls and check the invoice itself. Changing the customer record may not update an address already saved on an invoice.
- Validation failed before delivery: Once the correction is approved, use the configured retry or release process. Confirm that the original document was not already delivered, then check the new result.
- Delivery still in progress: Check for a service incident and allow automatic retries to work. Avoid repeated submissions. If there is no progress, send your administrator the invoice number, Azdan reference, message and time.
- Receiver or FTA rejection: Read the exact reason before deciding whether a correction is needed. Keep the issue assigned to a named colleague until the result is resolved.
If an issued invoice needs a financial correction, use your approved credit-note process, described below. Keep the original invoice and its delivery evidence.
Create a credit note when a correction is required
In QuickBooks, select + Create > Credit note or + New > Credit note. Choose the customer and enter the credit-note date, items, quantities, amounts and tax treatment. Give the credit note its own number.
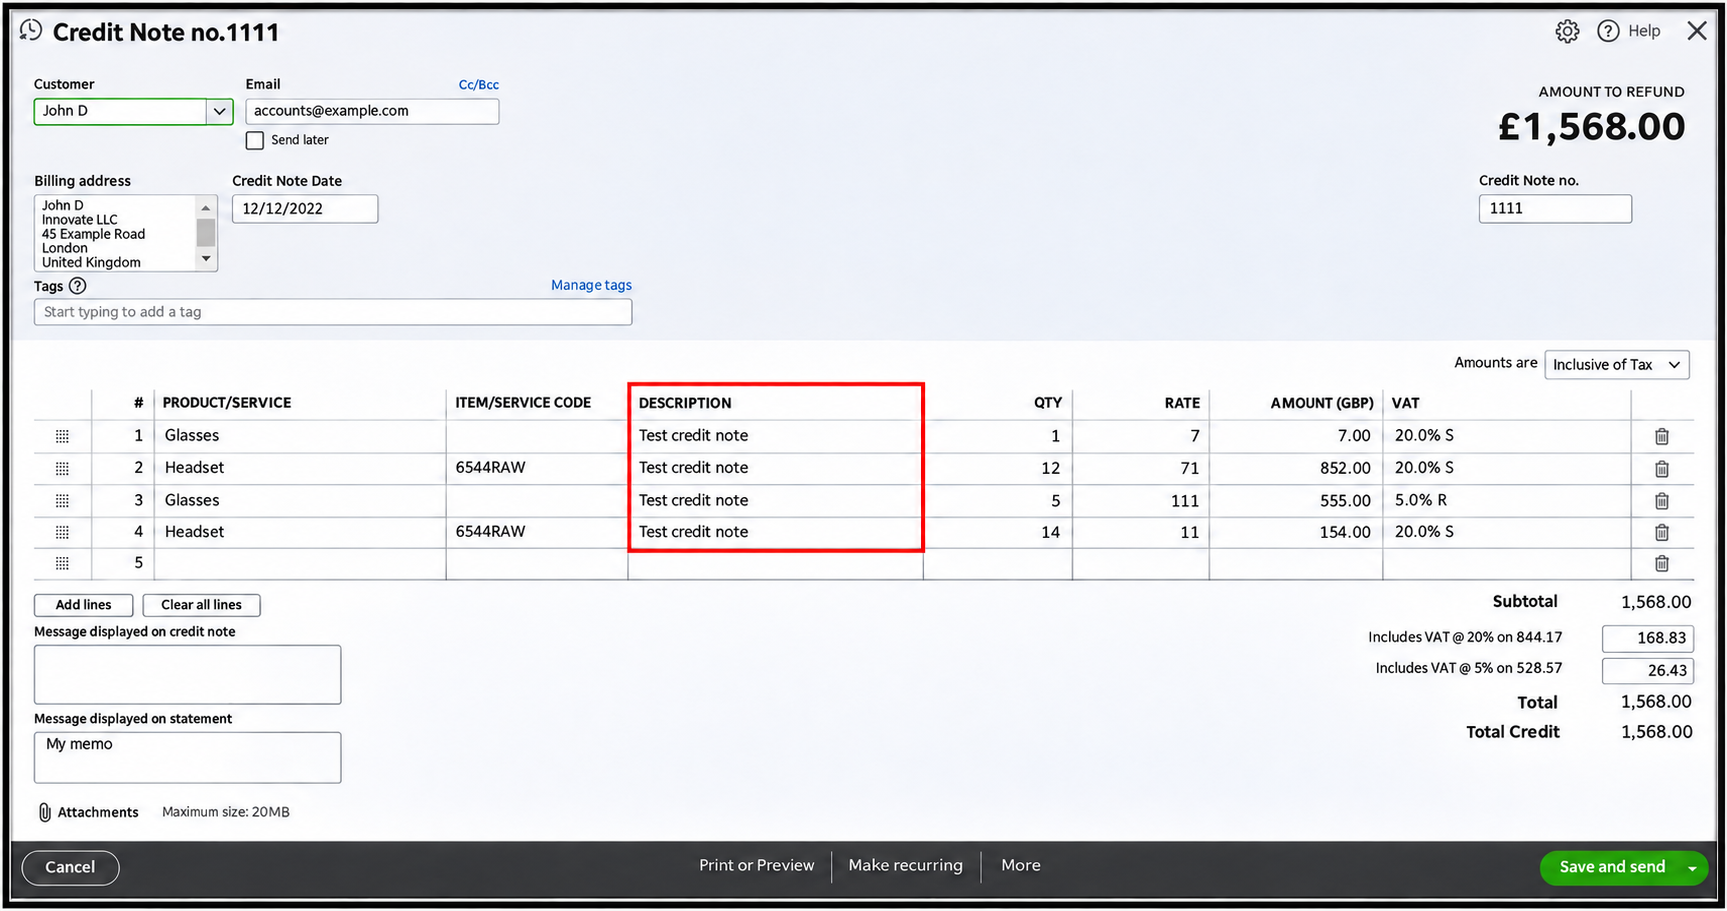
Record the correction reason and the original invoice reference in the fields your connection uses, where required for that correction. Confirm the amount and VAT with the person approving the adjustment. Save the credit note and follow its configured approval and e-invoicing release process.
If the credit should reduce an open invoice, apply it through your normal receivables process. For manual application, open Receive payment, select the customer, tick the invoice under Outstanding Transactions and the credit under Credits, then check the allocation and save. A credit-only allocation is not a cash receipt.
Find the credit note in Azdan using its own number and check the same four results. Keep the credit note linked to the original invoice in your records. A QuickBooks delayed credit is a different feature; use the document type approved for the correction.
8. Return to the original invoice in QuickBooks
Open Sales > Invoices. In the newer navigation, use All apps > Sales & Get Paid > Invoices. Find the original invoice number and select the row to open its details. Use Edit invoice or View/Edit when you need to review the full saved form.
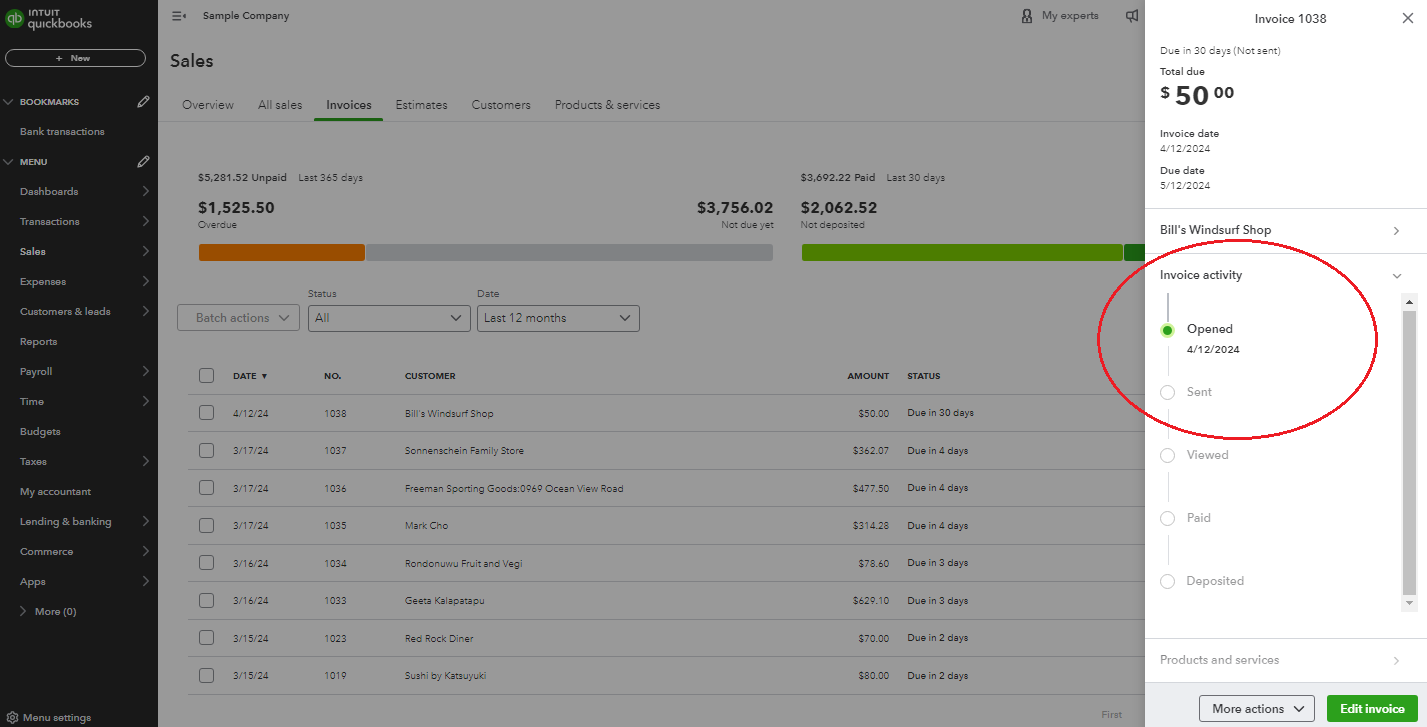
- Match the customer, currency, VAT and original invoice total to the Azdan transaction. Check any related credit note separately.
- Open the result field, note, attachment or linked record that your company’s connection uses. Check the Azdan reference and the latest returned results. Standard QuickBooks invoice activity, shown above, does not display Azdan results.
- If the configured return update is missing or older than Azdan, ask your administrator to check it. Do not create another invoice to refresh a status.
- Keep payment processing separate. Electronic delivery does not record a receipt or clear the customer’s balance. Record an actual payment only through your normal payment and reconciliation process.
The review is complete when the original QuickBooks invoice is matched to the correct Azdan transaction, the amounts agree, the returned results have been checked and every outstanding issue has an owner.
The screenshots illustrate standard QuickBooks and Azdan screens. The release action and location of returned results depend on your company’s configured connection.
Related guides
Azdan UAE E-Invoice documentation